Finishing and dyeing aluminum at home is surprisingly easy! It generally progresses in these four steps:
- Etching: removing the previous surface and cleaning up the surface texture.
- Anodizing: building a new layer of oxidized aluminum on the surface.
- Dyeing: adding color to the surface.
- Sealing: finishing the surface treatment.
But first, some important notes:
- This involves using both strong acids and bases, and is dangerous. Eye protection is mandatory, and thick rubber gloves are strongly recommended. You do everything in this at your own risk.
- Anodizing alters surface dimensions, so don’t use it for parts that need to be dimensionally accurate to about 1-thou. Expect the etching step to remove 0.0005”-.002”, and the anodizing step to add a different amount in the same range. (Given that you’re doing this at home, you probably don’t care about this.)
Preparation
Before starting, prepare the following equipment
- Safety equipment
- Goggles or glasses with coverage on all sides.
- Rubber gloves.
- Closed-toe waterproof shoes.
- A sink with running water nearby.
- A weak acid (vinegar) and a weak alkali (baking soda) to pour or sprinkle.
- A tile floor with Sodium Bicarbonate (baking soda) sprinkled onto it.
- If any acid droplets spill this will fizz up and alert you to that.
- Avoid any concrete, wood, or other flooring that reacts badly to strong acids or base. You can use a plastic sheet if the type of plastic is compatible.
- The following liquid baths, in the order they are used:
- Sodium Hydroxide bath, about 25g dissolved in 1L of distilled water.
- A distilled water bath for rinsing, enough to submerge the part.
- Sulfuric Acid bath, 18% by weight.
- A bath of saturated Sodium Bicarbonate, to neutralize the acid. If acid spills on you or a work surface, use this to quickly stop the acid from damaging whatever it landed on.
- A distilled water bath (you can use the earlier one again) to rinse it.
- A bath with an anodizing-compatible dye dissolved in distilled water, held at the working temperature.
- A pot of tap water that can quickly be brought to boil, possibly inside an old electric kettle.
- This anodizing equipment:
- A bench-top power supply that supports both current- and voltage-limiting. This must also have short-circuit protection, because it is very easy to accidentally short the poles. The power requirements are modest: Amazon has many similar 30V/5A, any of which are sufficient.
- A lead sheet and titanium wire to act as electrodes.
- Some way to hold the dye at a temperature between 40C–50C. I used an ultrasonic cleaner with heat, but a sous-vide machine will do the same.
- Some way to boil your part in tap water. An old pot on the kitchen stove works just fine.
When diluting the sulfuric acid, begin with 1L of distilled water and slowly add 187g of 97% sulfuric acid to it. Never add water to acid, it may boil and throw droplets of concentrated acid all over your skin!
Both Sodium Hydroxide and Sulfuric Acid are commonly sold as drain cleaner. If in doubt, look up the Material Data Sheet (also called Material Safety Data Sheet or MSDS) on the manufacturer’s website and that should include the active ingredients and their concentrations.
A lead sheet and titanium wire are strongly recommended as electrodes! While it is possible to use aluminum electrodes, this will save you quite some headache in debugging the process. The US$25 spent on Amazon is worth it.
When you choose your dye, you can either use Rit fabric dyes ($4/color) or professional anodizing dyes ($10/color). Very little dye is actually consumed with each part, so the factor that changes the amount you need is the volume of liquid you need to submerge the part. Note that not all Rit dyes work (in particular, the black powdered dye does not work.), and the Caswell dyes work more reliably. I suggest using the professional dye for your first attempt, and once you have validated your setup, test out the fabric dyes.
Process
Lets go over the four stages.
Etching
In this step we remove the natural oxide layer on the surface of aluminum. Any imperfections on the surface will be visible after anodizing, so ensure the part is at the desired finish before proceeding to wash it in distilled water.
Begin by completely cleaning and degreasing the part. Any trapped grease will prevent either etching or anodizing and will show up at the end. Once you de-grease the part, only handle it with clean gloves.
Suspend the part inside a sodium hydroxide bath to remove the existing surface. You will know its ready when a lot of bubbles begin forming on the part surface. To change the surface You can let it etch for more time to further smooth out the part.
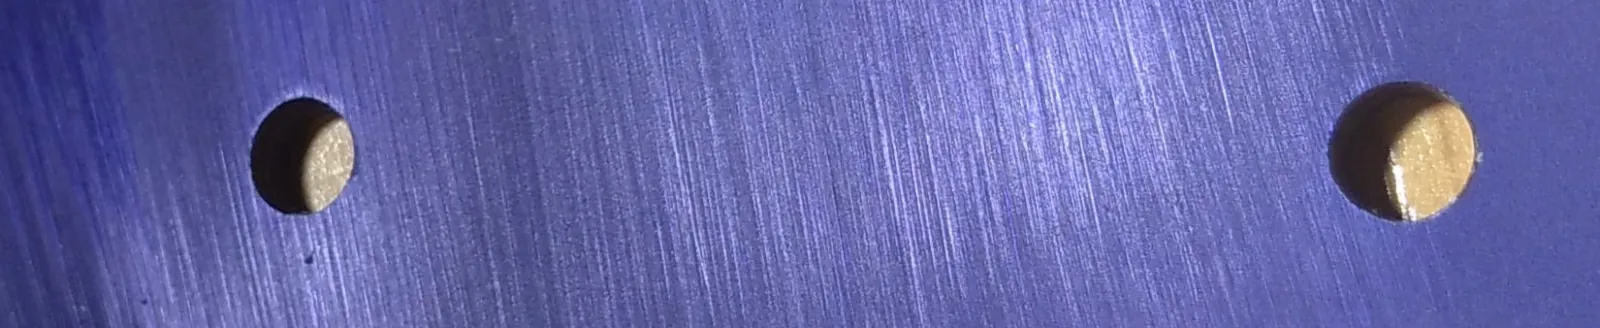
For reference, the brushed aluminum texture in the first picture was created with a belt sander and 600 grit paper, followed by a few minutes etching.
Anodizing
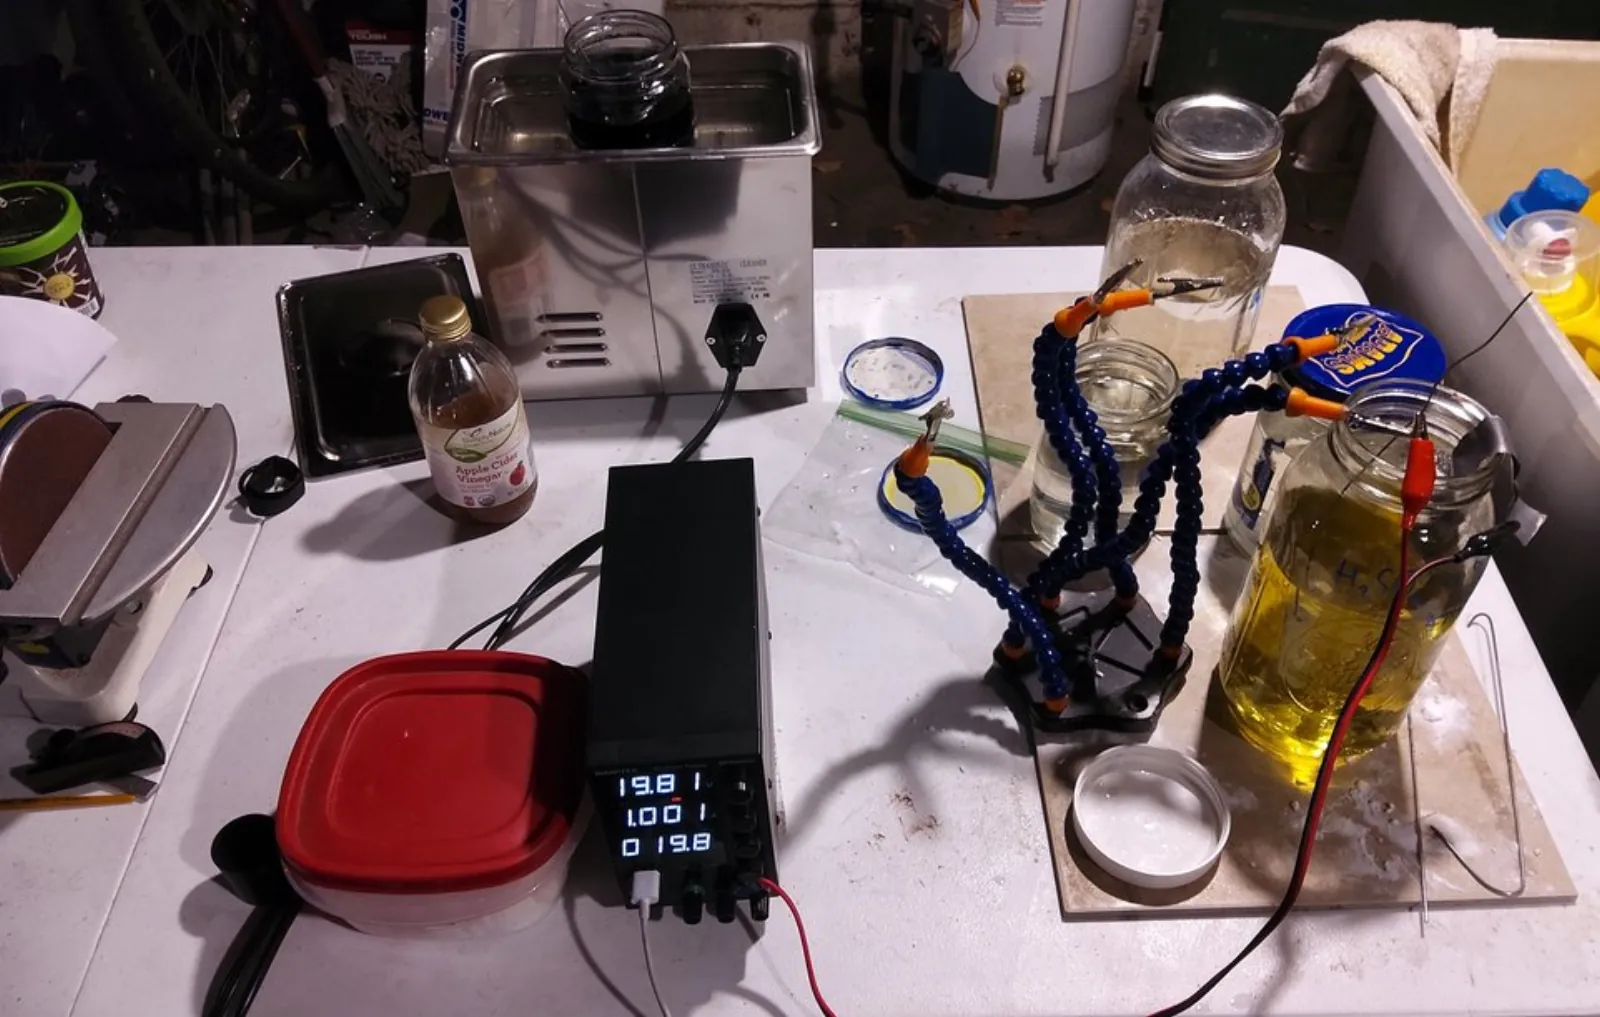
Connect the lead electrode to the negative lead of the power supply, and the part (via a titanium wire) to the positive lead. Immerse both in the sulfuric acid bath, check they are not touching, then power on the bench-top power supply.
You can use your CAD program to estimate the surface area of the part. Caswell recommends 0.030 amps per square inch for 90 minutes, though on small parts a much more aggressive setting of 0.1 amps per square inch for 30 minutes has worked for me. Keep the temperature under 70 F by immersing the entire bath in a bucket and dumping some cool water around it.
Turn off the power supply, remove each part from the dye, and rinse it in the bicarbonate then the water bath.
Dyeing
Keep the dye at 50C for Caswell dyes, and (from YouTube videos) about 40C for Rit fabric dyes. Immerse it for 15 minutes at this temperature. If you briefly pull the part out of the dye, you should be able to see the dye change the color within a minute of starting.
When using fabric dyes, be warned that not all dyes work. In particular, the black dye molecules are too large to fit inside the pores in the anodized aluminum surface. Be prepared to test a few dyes.
Rinse the remaining dye off the part with tap water before sealing.
Sealing
This is the easiest part. Boil the part for 15 minutes, hanging it so all surfaces are exposed to the boiling water.
Some dye may escape, so don’t use a container that needs to be food safe. An old kettle is good, as is an old pot on the kitchen stove.
Results
Here are some examples of what I’ve been able to do at home. The color used is Caswell Blue 4A. A quarter ounce of the dye was sufficient to fill my dye bath, and can probably be used to make years of parts.
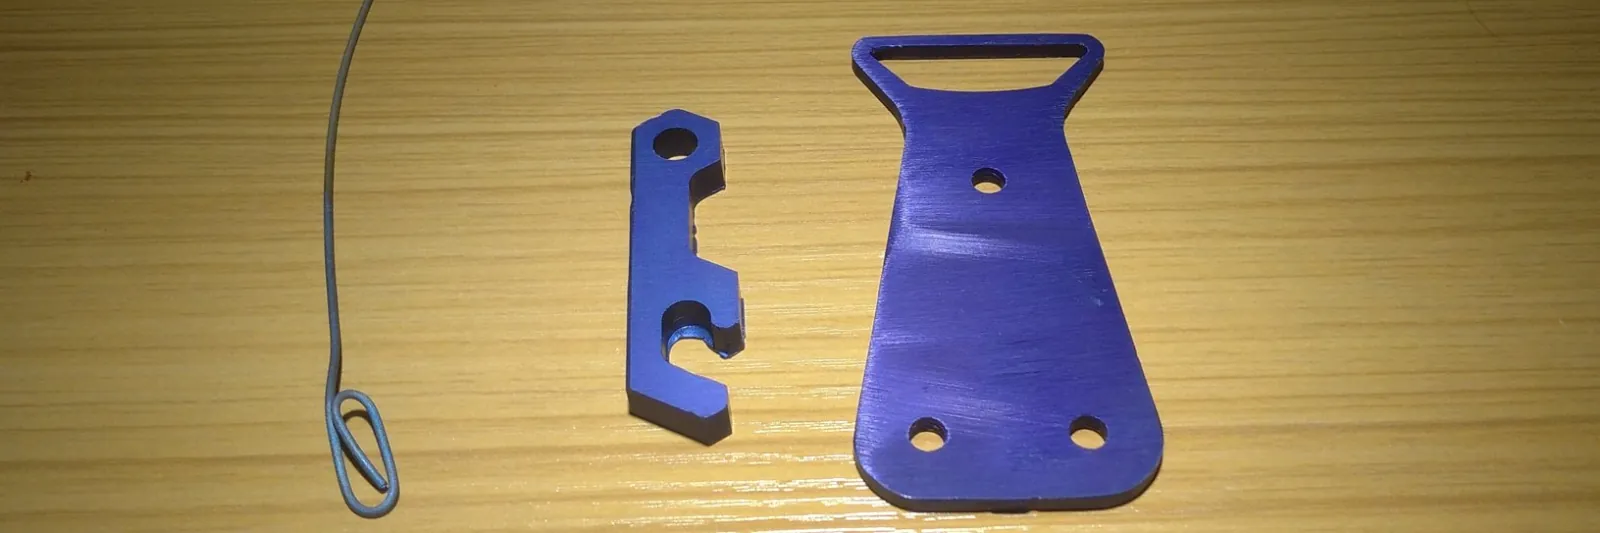
The wire on the left is titanium; I anodized it by passing too high a voltage through the bath. If you follow the 0.03A per square inch recommendation, this shouldn’t happen.
The bottle openers show different aluminum finishes: the small bottle opener is a bead-blasted finish with light etching, and the large one shows 600-grit sanding with heavy etching.