I embarked on this project because I wanted to use my CNC machine for something practical, and what better to use a machine for than to build another?
Setting up CNC toolpaths is also a lot more complicated than 3D printing, and the cost scales considerably with each unique design and with each unique set-up. To make matters more interesting, I don’t have an automatic tool-changer on my machine, so each tool change adds further complexity. All this makes for a very interesting design constraint: to design things with as few unique parts as possible, and using as few tools as possible. This is why you’ll find that many parts have key features on only one side (which makes for fewer set-ups) or are designed to be symmetric (so I need to design toolpaths for fewer unique parts).
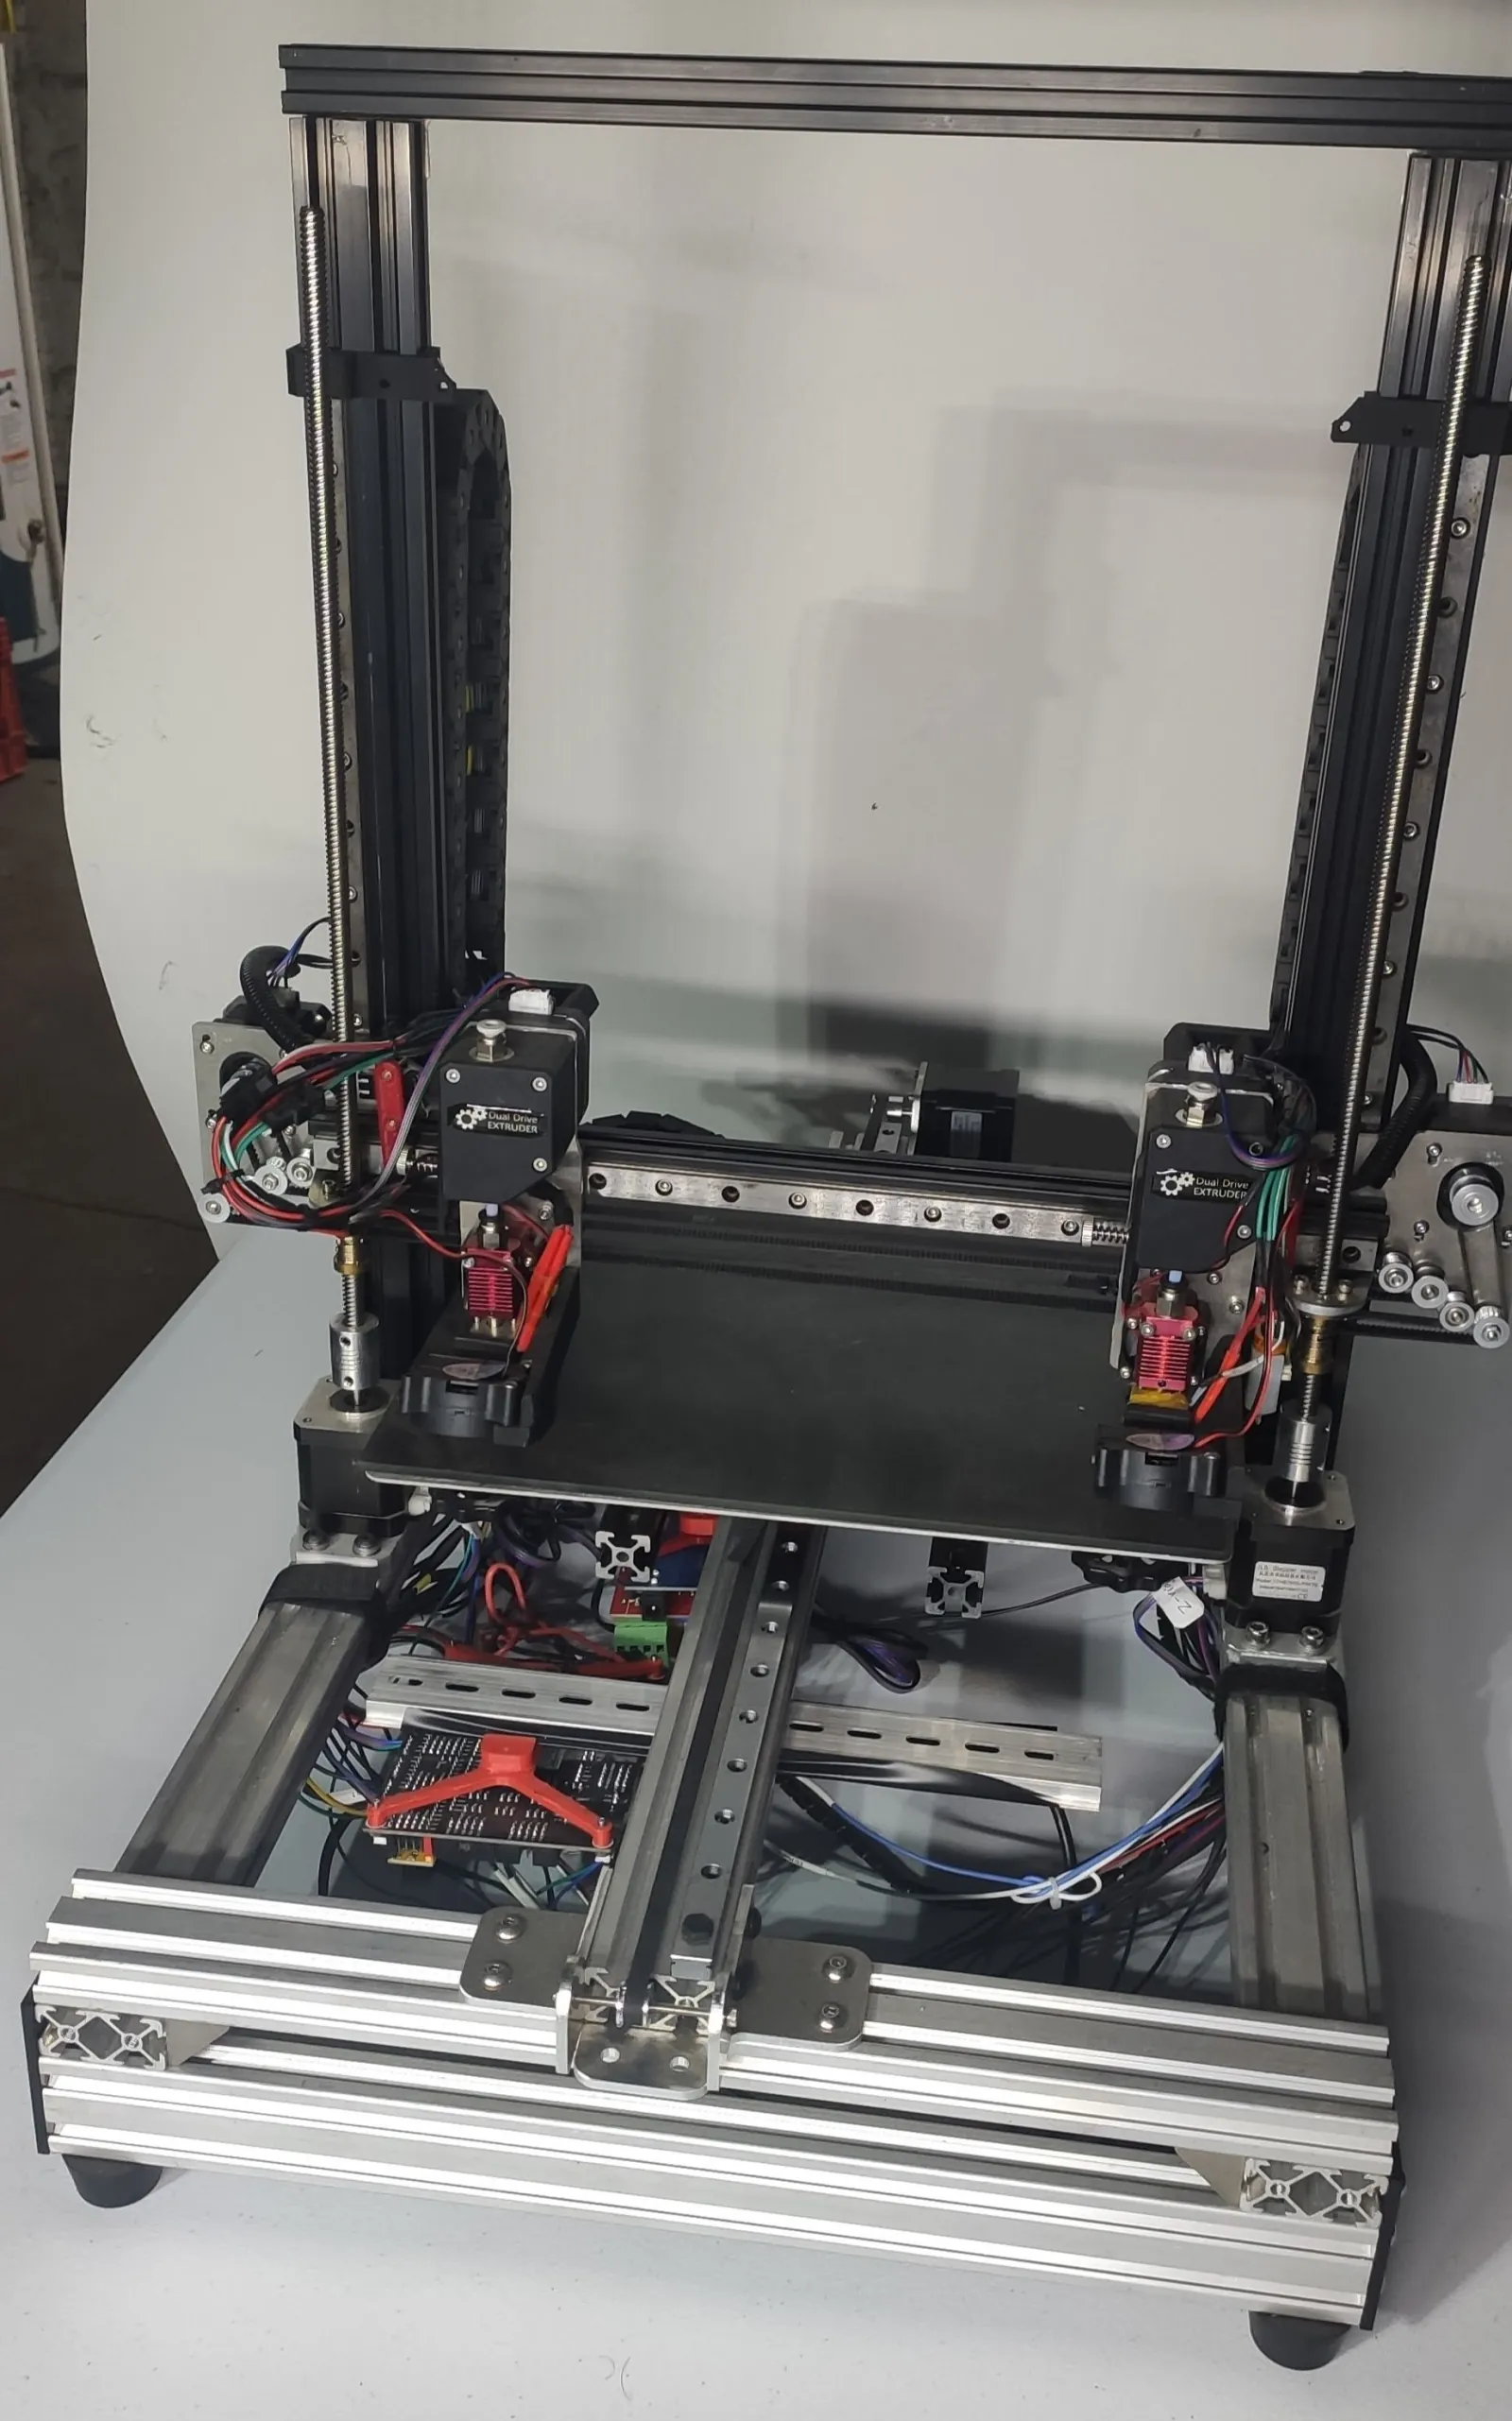
Overall Design
The design is a fairly standard belt-and-rail IDEX, following the same overall geometry as the . The print envelope (approximately 300mm x 300mm x 200mm) was set by the spare parts I had on hand. I believe the only parts I had to purchase for this printer were the Y-axis linear rail and a power supply.
Independent Dual Extruder X-Axis
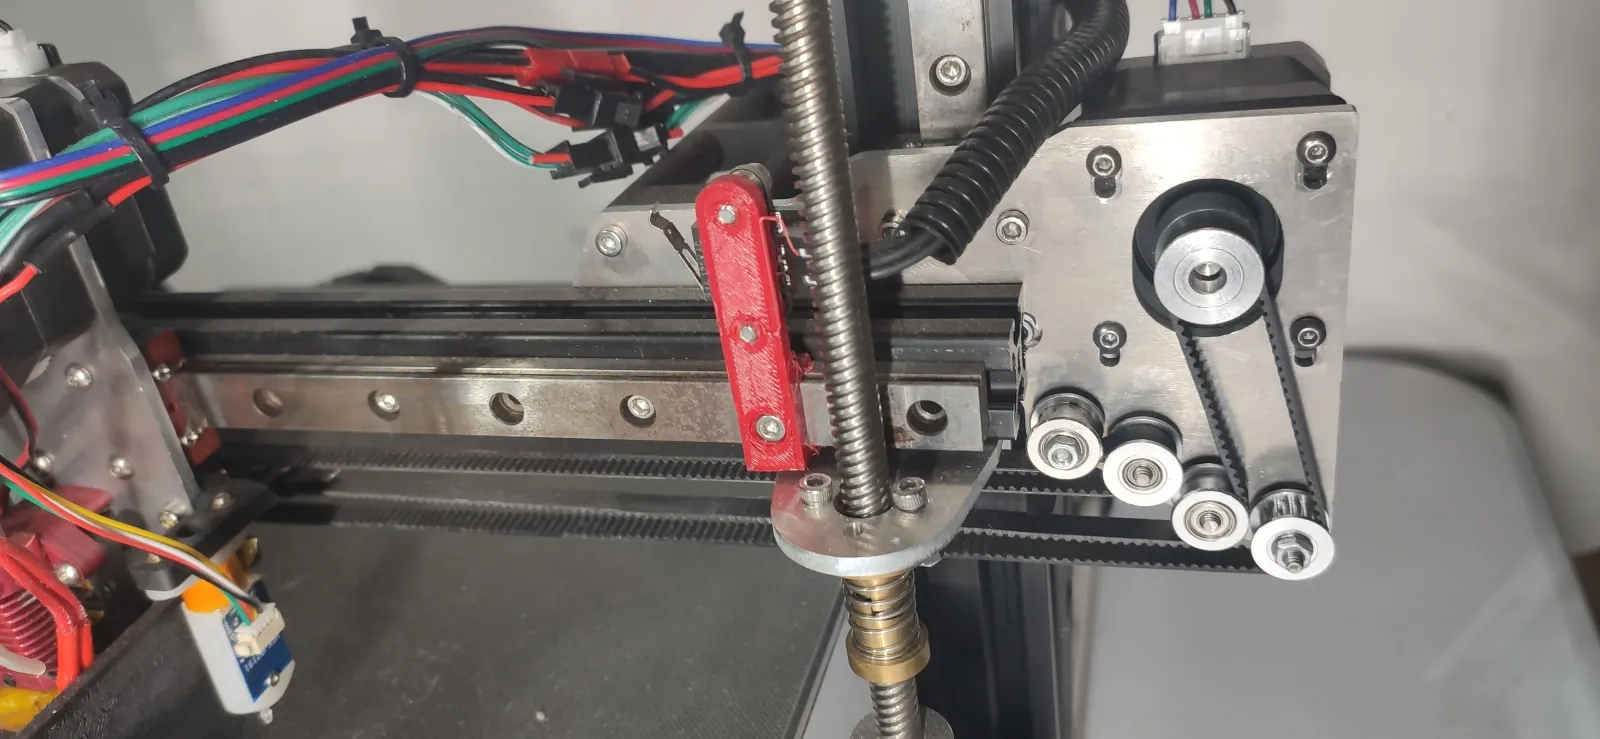
The hardest part of designing an IDEX printer is compressing the belt paths into a reasonable space, a challenge made more difficult by my requirement to make parts as symmetric as possible. To meet that requirement, I designed a pair of symmetric motor plates that hold the X-axis to the Z-axis, the X-axis motor for one hotend, and the X-axis idler gear for the other hotend. Using a pair of idler gears is key to this design: not only does this allow for the two sides of a belt to be routed closer together, but it also allows for the same motor plate, when flipped, to be used to drive either axis without modification.
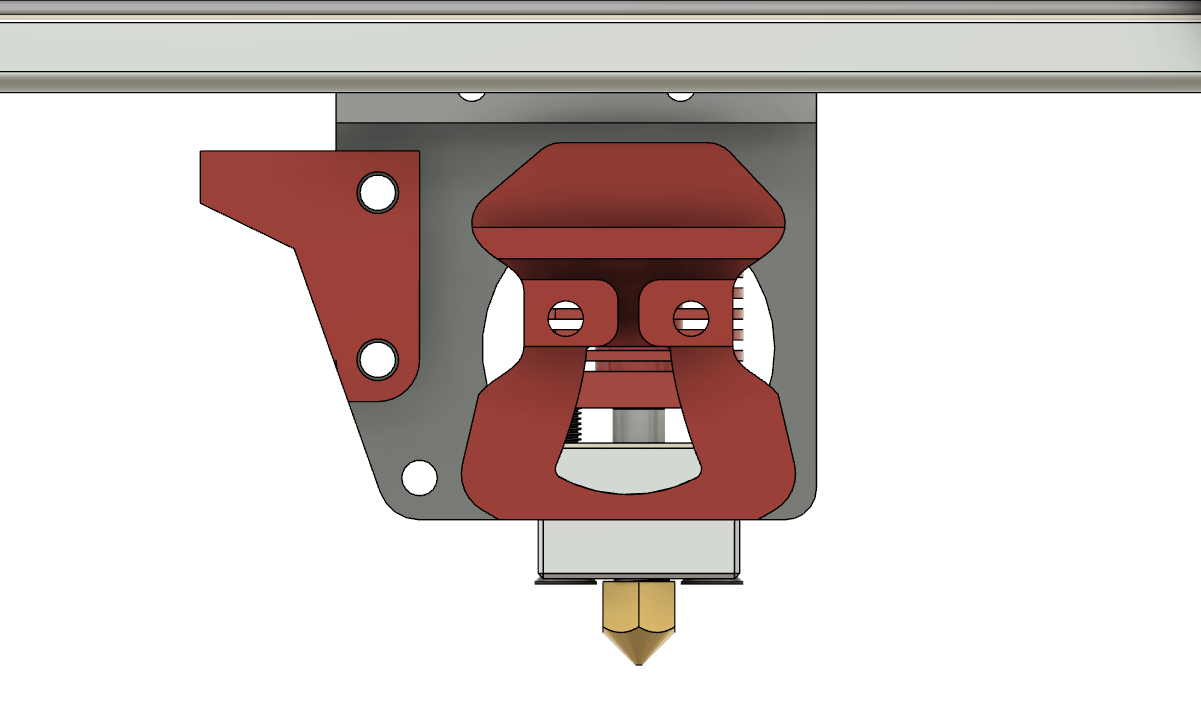
To reduce design complexity, this also extends to the way that the belts are attached to the X carriages. Both left and right carriages are designed to be identical and the belt clamping mechanism is also symmetric, so it can be mounted to attach to either belt. A key drawback of the belt layout in this printer is that the length of the belt for one motor is much longer than the other, so the axes have different resonances and potentially different print qualities.
Other minor design details include the motors holes being slotted so the motor can act as a belt tensioner, which saves on designing a separate component. Also shown is the red X-endstop mount. The plan was to eventually remove that separate part and instead also mount that to the motor plate where it would trigger off the extruder motor instead of the extruder body, but that was a minor enough improvement that I deferred that to later.
The Simple Y-Axis
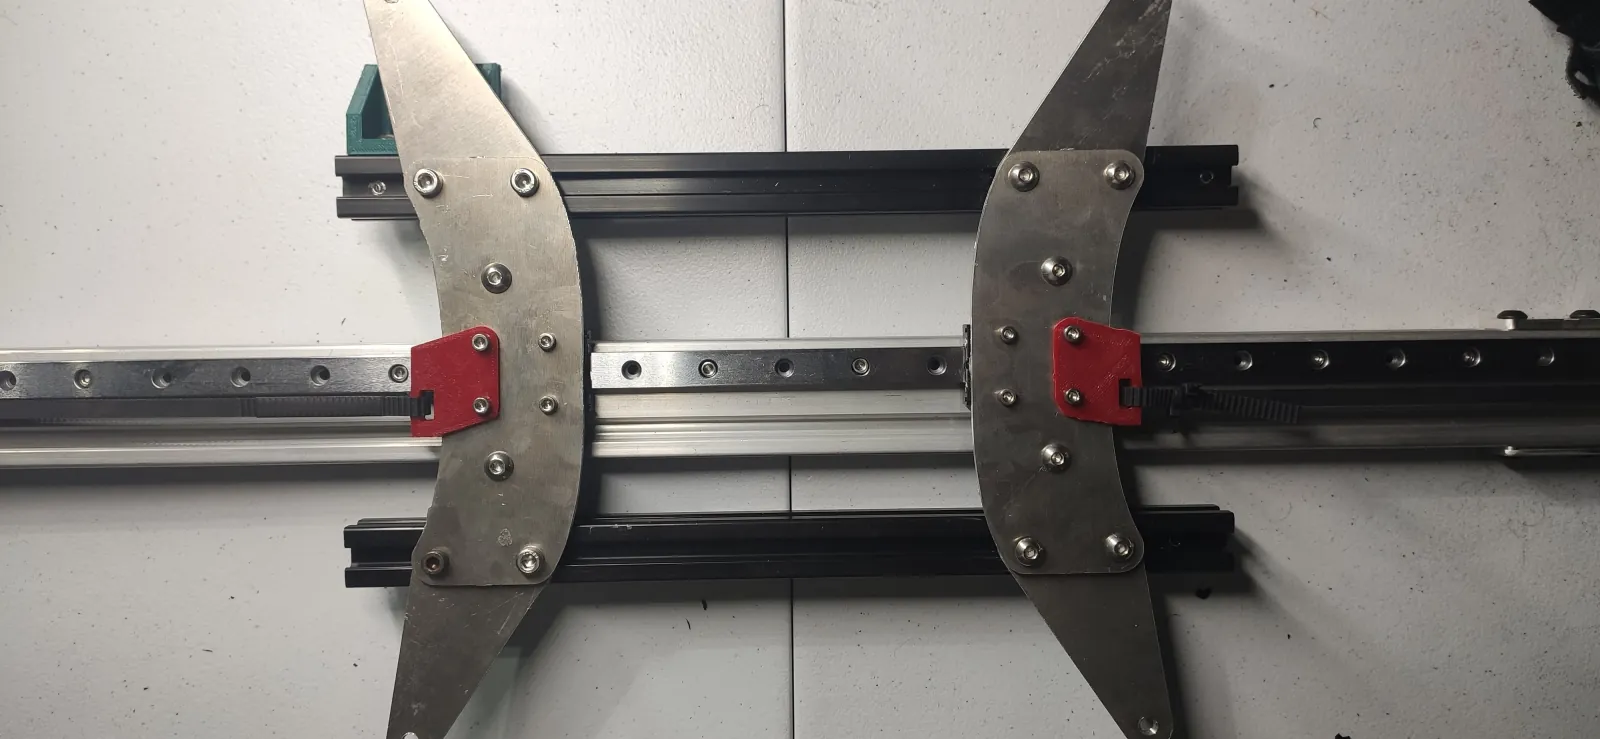
This is the simplest possible Y-axis design, with a carriage riding on two bearing blocks. The most interesting part of the design is the aluminum baseplate is assembled from six machined parts (only two unique designs!) with a small length of 2020 extrusion to hold the parts together. The design could be simplified further, but I was constrained by the size of aluminum stock I had access to.
The belt forms a continuous loop passing through the hollow center of the extrusion, as is done in virtually every cheap bedslinger 3d printer. 3D printed clamps hold it to an aluminum carriage, and the green part is used to trigger the fixed Y-endstop. The bed itself would be mounted to the outsides of the carriage using the usual levelling springs and hand-wheel nuts.
The original Y-axis design used mini V-wheels and V-slot extrusions to provide linear motion, but motion was not sufficiently smooth. After some experimentation, I figured out the reason for that is that and the heavy weight of the bed was applied to the wheels axially. The wheels and bearings are much better suited to bearing weight radially, and the only reason that the Ender 3 gets away with that design is the bed is extremely light. Rather than redesign the entire assembly to rotate the wheels, I purchased a cheap linear rail and kept the original design.
Test Print
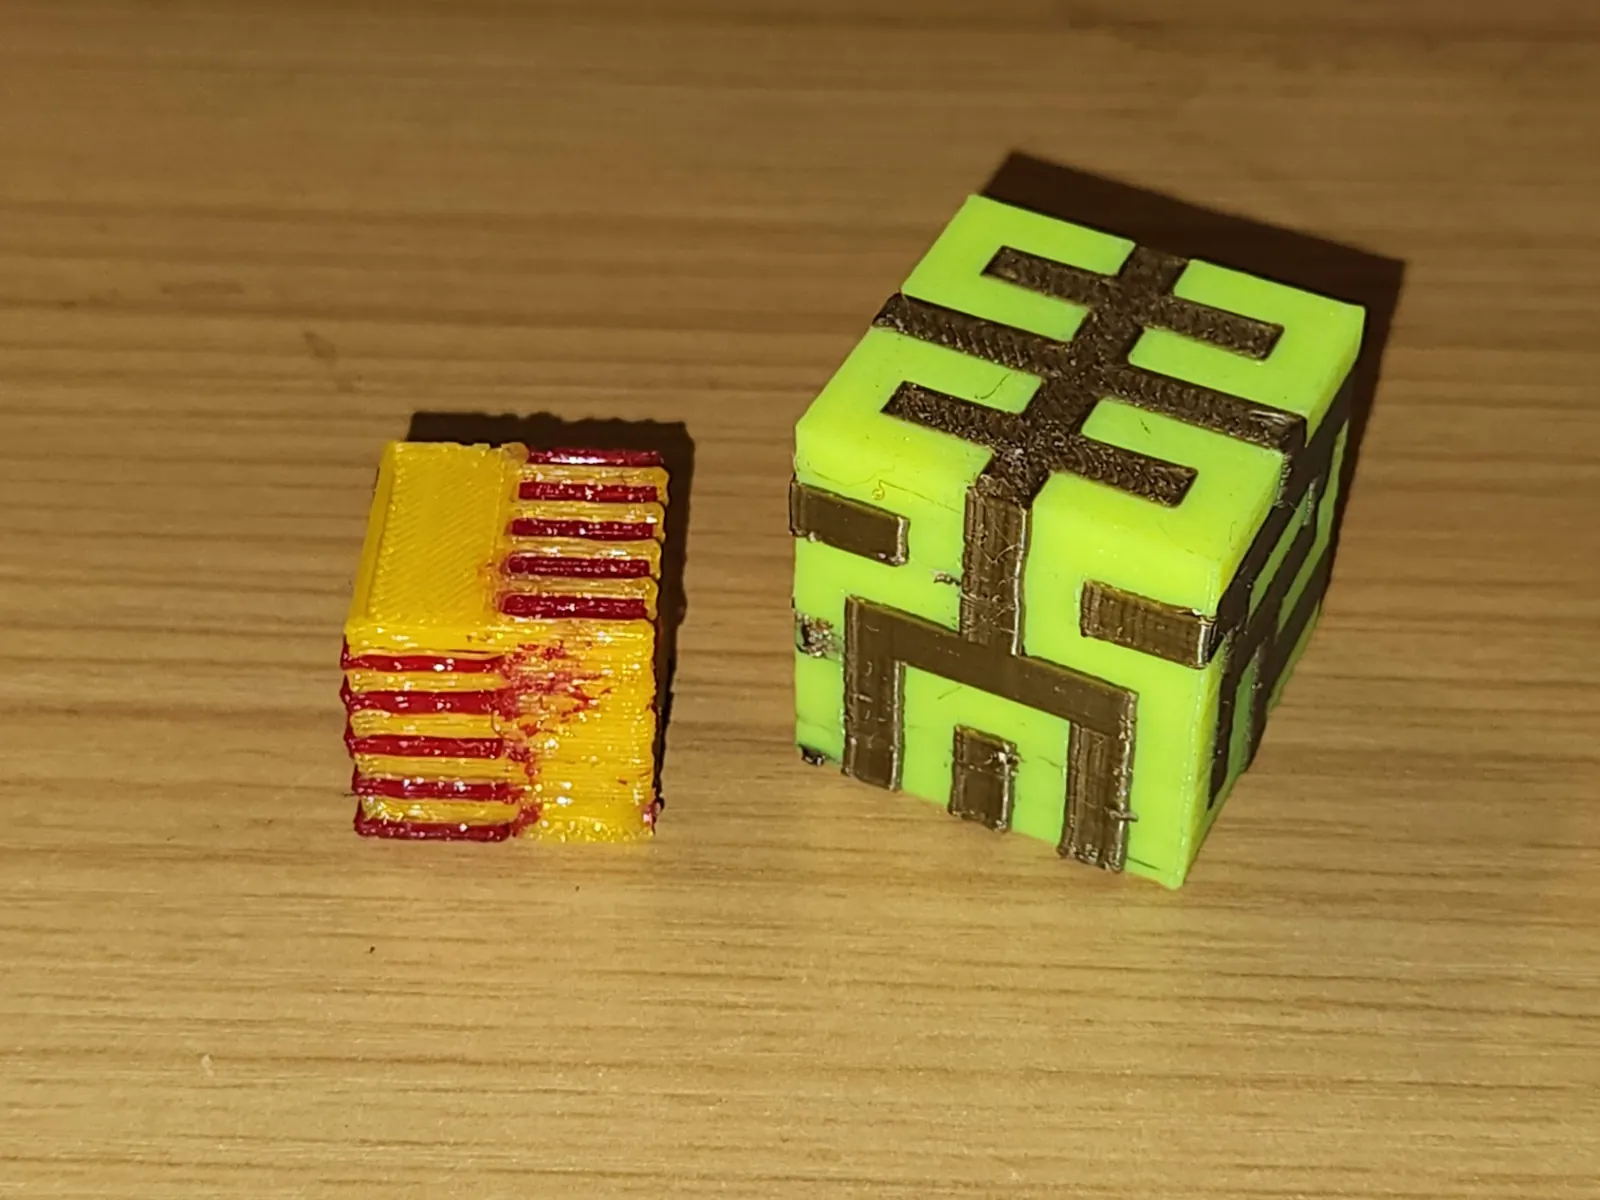
All this lead to a pair of test prints: my first-ever print (left), and the ability of the printer after some tuning (right). The quality is acceptable, but not great, and the speed was painfully slow. The small 10mm cube took about 30 minutes to print, including a three-minute bed probing routine.
Performance
This printer is not exactly performant. There were two chief technical problems with it: a very slow, heavy, and resonant Y-axis, and poor probing performance. In retrospect, the first should have been obvious from the start: the 350mm glass bed is much heavier than most commercial bed-slinger design, and the specified motor is clearly struggling to accelerate that much mass. The size of the bed also makes heating much slower and getting a consistent first layer harder (it warps much more as it expands). The BL-touch probe used was inconsistent, and I could never figure out why. Probing would fail maybe one time every twenty, which is just enough to make every other print fail.
What ultimately killed my interest in the project is that I realized that don’t actually need an open-frame IDEX printer. The open-frame nature means it is only suitable for PLA. Since most of my interest is in single-material ABS parts, so this printer lay unused for a year before I disassembled it. I ended up building a Voron 2.4 instead.