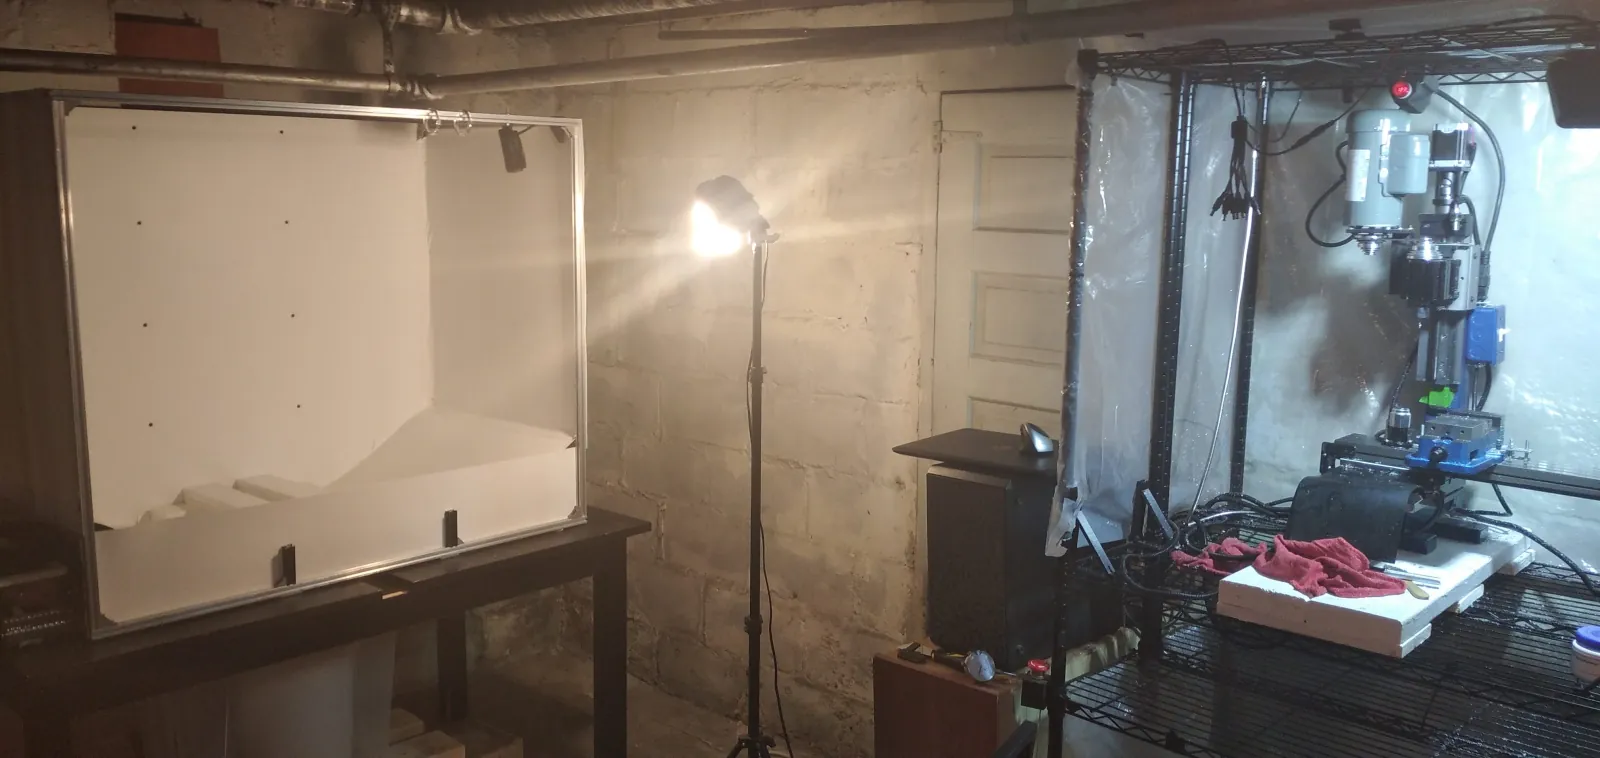
Pictured above is the taig in the old enclosure, ready to be moved into the new enclosure. The new enclosure is set onto a table (with a gap in the middle for a coolant drainage pipe). When the taig is placed in the new enclosure the scale of the enclosure becomes clear.

To allow coolant and swarf to drain from the bottom of the enclosure, and to distribute the weight of the mill, it is placed on top of a simple wooden frame. A thick layer of outdoor paint (urethane-based, I think) protects the wood from the corrosive effect of long-term coolant exposure.
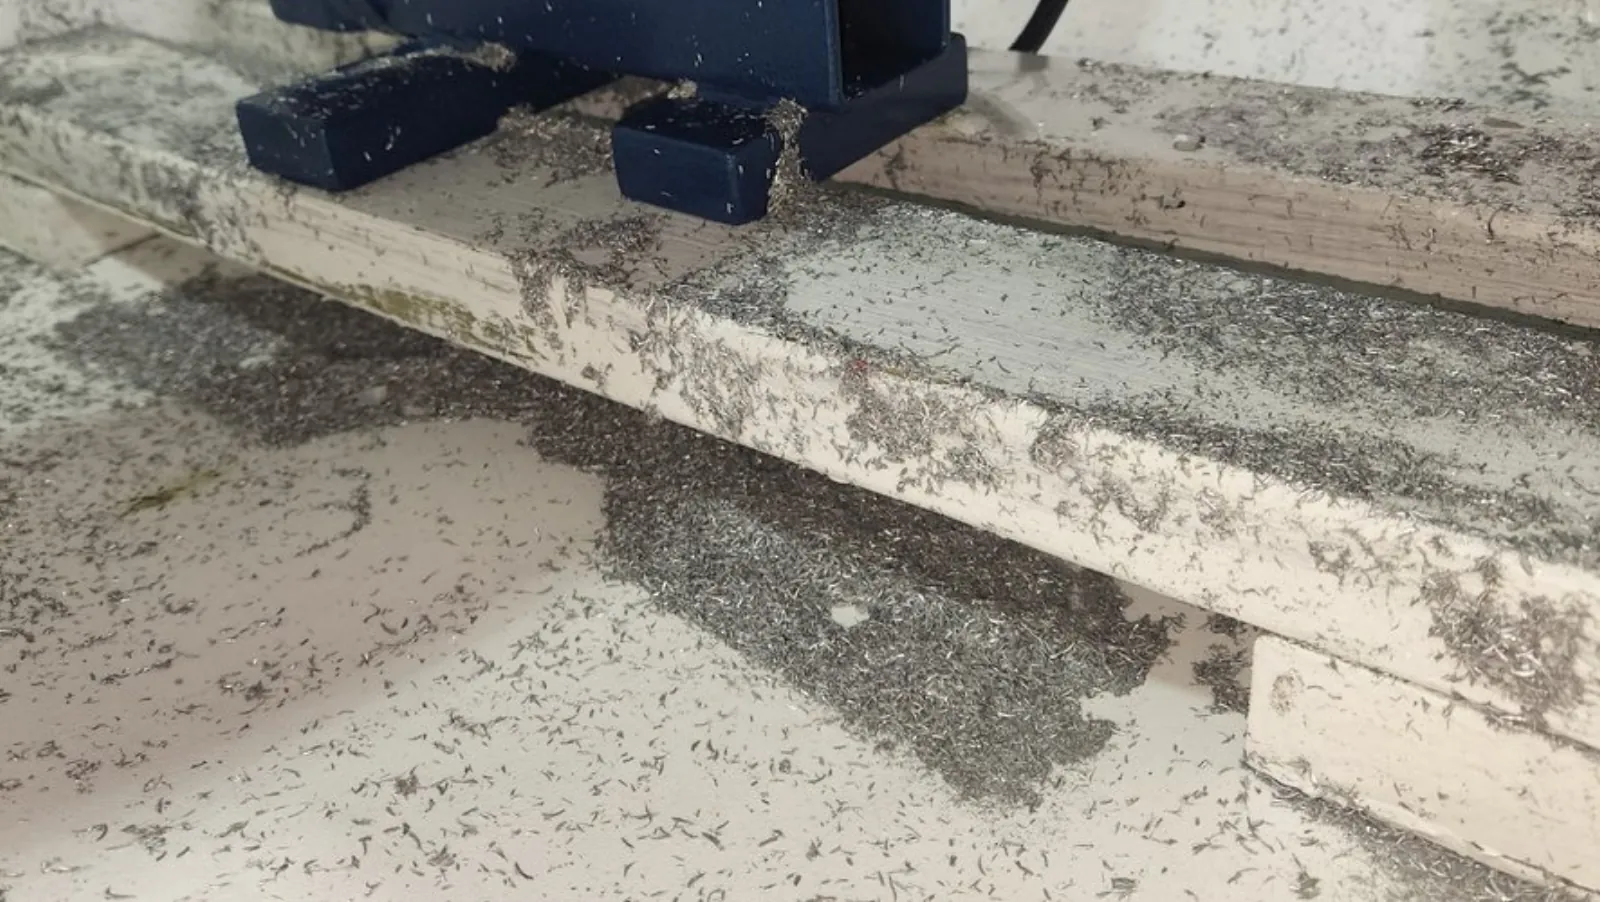
The collecting swarf reveals a key limitation of this design – we need steeper and smoother walls for swarf and coolant to drain well. The new enclosure is built to exactly contain the Taig over its full range of motion – at the extreme left position (pictured below), the X-axis motor limits the slope of the drainage slot.
TODO: Add pic of frame with the panels removed.
Materials
The frame is made from cheap 2020 aluminum extrusion, with extra horizontal bars to support the top of the sloped bottom. A 1/2” thick wooden beam supports the sloped sides from underneath, resting on the aluminum extrusions.
The panels are 1/16” FRP wall liner (sold as Polywall at Home Depot). About a hundred M5x6 BHCS and roll-in nuts are used to hold the FRP to the extrusions – the FRP is tough enough that it is enough to cut a small X into the panel at the appropriate position and just force the screws through. The FRP will not tear easily.
Gaps between FRP panels are sealed using waterproof silicone caulk. I recommend a caulk that sets in wet environments – those can be spread thinner with a wet, gloved finger. I don’t recommend waterproof gorilla tape – it is extremely sticky and adheres swarf long after the frame is assembled.
The front is covered with a shower curtain (not pictured) cut to length. It will stain over time, but is cheap enough to be replaced easily. A substantial front lip returns drips from the shower curtain to the tank.